


Building my own solar power system
PG&E Sucks or: How I Learned to Stop Worrying and Love Building my own Solar System
--
Well it happened. PG&E has dropped the facade of necessary rate increases because of system upgrades, and they have come out and said what we knew all along: they only care about profits. Then they turn around and spit in our faces by telling us our bills are actually lower than they were a year ago. And if you really want to get your blood boiling, go read this nonsense from their CEO.
Last year I got sick of it and started looking at deploying a solar system, and that was before PG&E decided to have 6 rate hikes (#7 on the way). Now a year later, my solar system is up and running, and I no longer cringe anytime I hear the AC kick on in the Bay Area heat (we can’t all live in SF). Here’s how I did it.
Fair warning, I am going to go deep into the weeds on some things. Feel free to skip over sections you find boring or you can even skip to the end if you want to read my lessons learned.
But first, a haiku to summarize the current state of power providers in California:
PG&E sucks
I hate the CPUC
This is all a scam
I received no compensation from any of the companies listed in this article. All thoughts and opinions are my own.
Table of Contents
- But Why?
- Research
- The Build
- Lessons Learned
But Why?
Aside from the obvious that PG&E rates are entering ludacris mode, I am a self-hoster. I have a rack in the garage that pulls a little less than 1kw. That’s 1kw 24/7/365. And though I have a garage fan that keeps it cool eight months of the year (and at night), in the summer I have a portable A/C that pulls about 800w when it’s running. It gets hot here, way hotter than what most folks think of when they hear Bay Area. Last summer there were months of an electrical bill north of $1200. Yikes.
You may now be thinking, well why do I need a rack that pulls 1kw? I guess I don’t, but the word downsize is not in my vocabulary. Maybe I’ll go over my self-hosting setup in some future articles if there is interest.
Research
Information Overload
As I began researching, it became apparent there were two paths I could take: a small system to offset my constant rack usage or a large system to reduce my need for PG&E (electricity at least — gas is another story) as much as possible.
The rabbit hole then started going deeper: Do it myself? Have a company do it? Batteries? Enphase? Microinverters? Monofacial/Bifacial panels? What is NEM 2/3? How do I rack the panels? Inside or outside the garage for batteries? City planning and inspection? The list goes on and on and can be overwhelming.
Eventually I decided that I wanted a full system to try and completely kill my electricity bill, not just a small system to offset the rack usage.
I figured the next step was to get some quotes for systems from local solar companies. Even if I ended up doing it myself, I could see ballpark pricing and see what kind of system they recommended. I found three companies and gave them my PG&E usage for the past year (about 16,000 kwh) and got three quotes ranging from ~45 — 55k.
But the catch was those systems all drastically undersized the battery in my opinion: they ranged from 5 — 15kwh. In the summer (when electricity is even more expensive), my rack + portable A/C + house A/C (3 ton) could easily be pulling 6kw. That’s not even accounting for other appliances like the microwave or stove.
I could easily burn through the batteries in just a few hours. This would at least stop me from pulling power during peak cost TOU hours (4–9PM), but the rest of the night I’d be pulling from PG&E. Also, once you go solar/batteries you actually have a wider time period of peak pricing, called partial peak, that goes all the way to midnight — E-ELEC. Now is a good time to talk about Net Energy Metering (NEM).
Net Energy Metering (NEM)
NEM is the agreement you have with PG&E that takes into account the energy you generate and the energy you use. Before 2017, customers would be on NEM 1, which offered the best incentives: free connection and the best export rates. Between 2017 and 2023 customers who installed new solar systems were put on NEM 2. There were a few additional costs passed onto consumers like slightly increased connection fees, but the actual rate you received from PG&E for your generation was the same. Then NEM 3 came in 2023 and the main changes were further increased connection fees and reduced export rates (by about 75%). Eventually everyone will be bumped to NEM 3, but many folks are grandfathered in on NEM 2 for 10–20 years.
NEM 3 means when you generate electricity, PG&E will pay you pennies on the dollar, then turn around and sell it back to you at inflated costs when you are no longer producing solar (i.e. at night).
The solution to this is to install a battery system, but batteries are expensive. Really expensive. Though I didn’t proceed with additional quotes for an even larger battery system, based on research (the quotes + me talking to some friends who had battery systems installed) I estimated it would be around 75k to have a ~15kw solar system and a ~40 — 45 kwh battery system installed from local contractors.
Side note, the California Public Utilities Commission (CPUC) was attempting to go back on some previously grandfathered NEM agreements, which in my opinion stresses even more the importance of power self sufficiency with solar and batteries. The bill was eventually passed with that section removed, but it still bumps folks to NEM 3 if a house is sold.
I’ll Do it Myself
After running some numbers I estimated I could build a system (~14.1 kw solar + ~43 kwh battery) for about 30k (before tax rebates). I decided on the following equipment:
- 1 x EG4 18kPV inverter
- 3 x EG4 PowerPro 14.3 kwh batteries
- 38 Aptos 370w monofacial panels
- Tigo CCA + optimizers for optimization, monitoring, and rapid shutdown
I had an idea of what size solar system and what battery system I wanted to do, but was unsure how to get approval from the city and how to create the drawings required. This is where I made a wise decision to hire someone else to do the plans for me. But wait, isn’t that against the spirit of building the system myself? Yeah I suppose, but really I’m building it myself to save money, and time is money. Building the plans myself would have taken way more time than is worth for me.
I learned a lot talking to the solar planner, and when the city came back with fixes required for the permit, I just forwarded the info and didn’t have to do anything. My solar guy was local and helped me navigate my local city requirements, so I recommend finding someone like that. It’s definitely worth the fee. I used https://layeredconceptz.com/.
String vs Microinverters?
Microinverters have become popular the past few years (at least in residential solar). One of the major benefits is each panel has its own little inverter, meaning if one panel is having issues (or is shaded), it does not affect the output of the other panels. This is nice, but it also means you are doing multiple power conversions if you are using batteries. It’s pretty much a requirement to use batteries now, at least in California, due to NEM 3.
With microinverters, the power would go from DC panels -> AC microinverter -> DC batteries -> AC load.
With traditional solar strings, the path is DC panels -> DC batteries -> AC load.
I decided on using a traditional string inverter due to less power conversions. Every time a power conversion happens you lose some power in the conversion. The less conversions you can do the better.
And because I am using Tigo optimizers for rapid shutdown and optimization, if one panel is shaded the rest of the panels don’t suffer. I’m not going to pretend to be an expert on solar panel optimizers and microinverters, but from what I can tell the rest of the panels in my strings perform just fine when one is shaded, thanks to the voltage optimizers. Signature Solar has a pretty decent video explaining them in more detail.
To be transparent, I purchased all the equipment I mentioned above from Signature Solar, but am not affiliated with them and all opinions are my own. I do think companies deserve shout-outs when I have a good experience with them, and Signature Solar provided excellent support and competitive pricing.
Why EG4?
Firstly, all the EG4 equipment was UL certified and approved for California. This was a requirement. Secondly, I wanted a DC system, not microinverters. EG4 has a few competitors in this space, such as Sol-Ark, Enphase (though Enphase is more in on microinverters), or others. Honestly, it came down to price and EG4 was more competitive on this over everything else I could find.
Rapid Shutdown
In California, any roof-mounted solar panels are required to have rapid shutdown capability. This means at the press of a button the panels will deactivate and lower voltages to almost 0 in the case of a fire. I decided on Tigo TS4-O optimizers, which act as rapid shutdown devices and optimizers. This required one optimizer per panel, Tigo Access Points (TAPs — one per section of roof) to connect optimizers to the Cloud Connect Advanced (CCA), and a Tigo CCA to control everything.
Main, Subpanel, & Inverter Modes
At this particular location, the main (100A) service panel (MSP) connects to a subpanel in the garage, which then goes to all the loads. So the plan was to have the MSP connect to the new inverter, which would then connect to a new subpanel, which then would connect to the existing subpanel.
The reason for a new subpanel was because of a city requirement that brought the maximum 200A pass-through from the inverter to 100A before going to the load subpanel, thus stopping any potential overload. In theory, this should never happen because I only have a 100A MSP service (so only 100A passthrough), and the inverter itself can only output at 50A, but the city wanted it so we did it.
The other option was to upgrade the MSP to 200A and the existing garage subpanel to 200A, but I chose to put in a new subpanel limiting the inverter to 100A. I may have decided differently if I was moving to an electric car or some other high demand electrical installs were coming, but this way I didn’t have to do anything with the existing subpanel or MSP (well, I actually did have to do something to the MSP, but I’ll get to that).
You’ll also notice I mentioned the inverter can only output at 50A, but the house has a 100A service. So what happens if my load tries to pull more than 50A? Firstly, the inverter can actually peak at higher than 50A. Normal usage is 12000W — 50A@240v. But it can output w/ PV: 14700W (10 min) — 61.25A@240v, 15500W (5 min) — 64.58A@240v , W/O PV: 13500W (10 min) — 56.25A@240v.
Secondly, the inverter can run in one of two modes that affect what happens if you try to pull above those numbers. On grid mode and off grid mode.
On grid gives you the capability to both sell power to grid, as well as pull supplemental power from grid. For example, let’s say I had a load pulling 15000w. This means I can pull 12000w from my inverter (and thus from solar and batteries), and the other 3000w can be pulled from grid. Pretty nice. This has a draw back though: on grid mode allows you to “bleed” power to grid even if you don’t want to. This means even if you have set your inverter to not sell back to grid but are running in on-grid mode, it can occasionally put some power on grid. Not only is this bad to do if you do not have Permission to Operate (PTO) from your grid provider (PG&E in my case), it’s potentially dangerous and illegal to energize lines from your provider without their knowledge.
There is another setting called “Fast Zero Export,” but I found it’s not perfect and you can still bleed power. The only way to assure there is 0 power export is to use off grid mode.
This means if your power usage goes above the inverter specs, it will completely swap to grid power until your power usage falls below the inverter specs again. The switchover between grid and solar/batteries is fast enough you can’t even notice it (~20ms or so), but you do lose the capability to pull supplemental grid power. In my case, this is fine because 99% of the time I am pulling less than 50A. I would probably only go over 50A if I turn on every single electrical appliance in my house.
You can read a lot more detail about my particular inverter on EG4’s website.
The Build
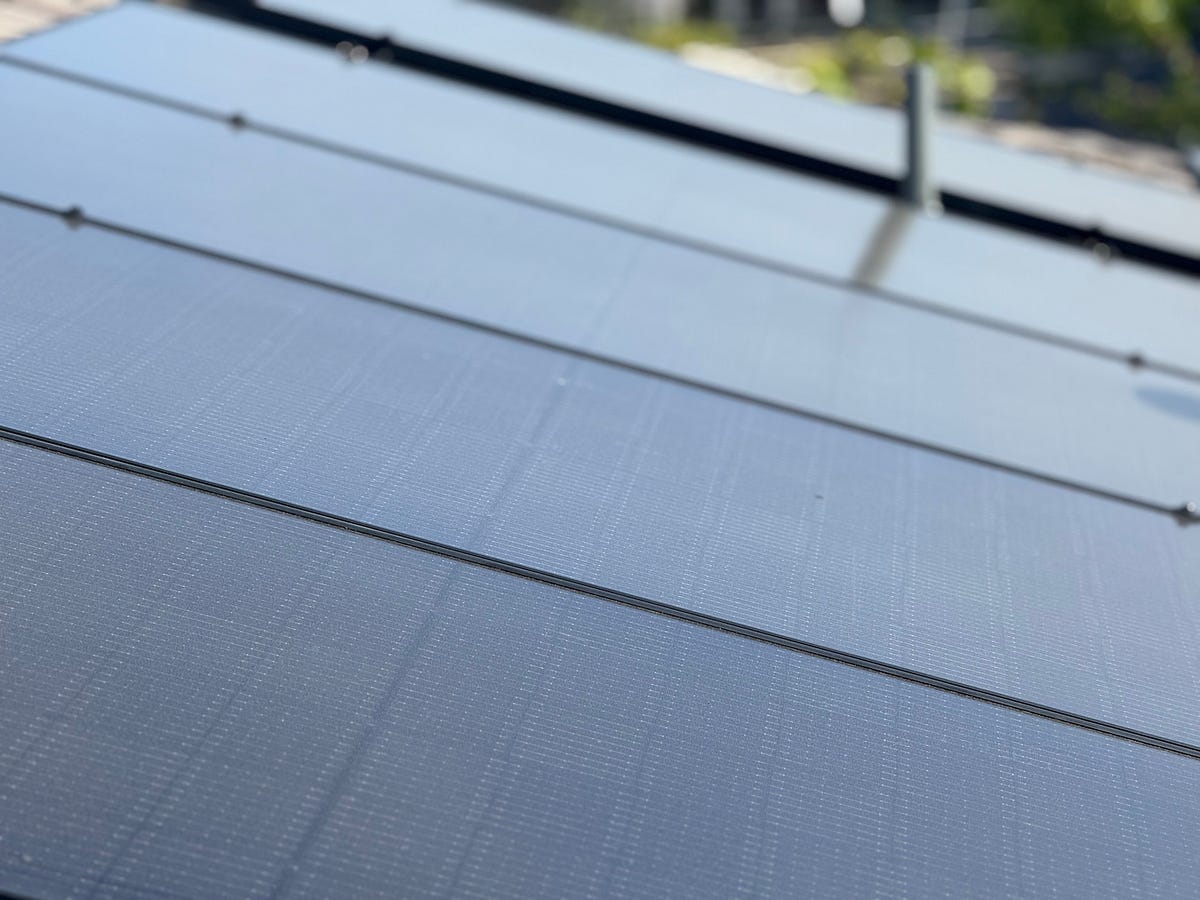
A New Roof
Before I could install a solar system I needed to have a new roof done. I could have probably gotten a few more years out of the asphalt roof, but I didn’t want to rip off the panels to redo it. So after a few months of quotes and scheduling I had a local roofing company come and replace it while I continued doing research on exactly what solar system I wanted. The cost was around ~20k.
Batteries Are Heavy
Once all the equipment was delivered, I had to figure out how to actually move the batteries into their final resting place. They weigh 300 pounds, and though they have some ropes to help you break them out of their shipping containers, that didn’t work for moving them. I settled on using some moving straps, which worked great. Two people would lift with the strap, while a third helped position the battery by the wall.
The batteries themselves are mostly supported by the feet, with the wall attachment used to stop them from falling over and to hold the inverter (which is considerably lighter than the batteries).
You’ll note I used Unistrut to mount the batteries and inverter. This was after I had already started building it with wooden 2x4’s, and then read in the battery installation manual to not use flammable materials. Woops. Always read the installation instructions. At least I didn’t get too far before I realized my mistake.
One other thing I will mention is I didn’t realize I was sent the outdoor version of the EG4 batteries until I had already mounted them. This shouldn’t be a problem because I was installing them inside the garage, but the cable shroud was for the indoor version and they are not interchangeable. A quick call to the seller and they shipped me the proper shrouds.
It would have been much more of a problem if I was sent the indoor batteries and needed them for an outdoor installation. Luckily, the electrical specs of the batteries are identical, they just have slightly different housing. The takeaway here is to really make sure you sent the proper equipment before you install it.
And even though the equipment I was using was outdoor rated, I installed the inverter and battery in the garage for a few reasons:
- The inverter is outdoor rated, but is supposed to be shaded. I would have had to build an overhang to shade it in the afternoon. There is also a small shed that would have had to be removed where it would have been installed.
- The garage has less extreme temperature swings.
- It is more protected from purposeful and accidental damage.
Of course, the main con is the system takes up room in the garage. Some shelves that used to be there had to go. I also had to install a heat detector in the garage that is networked with smoke detectors in the house because of batteries inside the garage.
Wiring is Simple When You Have Someone Else Do It
In theory, wiring the inverter and batteries isn’t too difficult. But it is not what I would consider trivial either, and I am far from an expert of electrical work. Now is a good time to mention I didn’t do this alone. My dad has a lot of experience with electrical work and did all the wiring on this job (don’t worry, I held the flashlight). Also, when I say “I” did something, it really was “we.” I think this is where many homeowners would probably outsource because dealing with 240v can be daunting if you have never done it. Lucky for me my outsourcing only cost me lunches.
The manuals of the inverter and batteries are very detailed and provided all the schematics for how to wire everything together. It is extremely important to follow them exactly. For example, it is imperative you use wire ferrules for all the connections inside the inverter to make sure each connection is solid and won’t come loose.
Here is a simplified overview of how the core components connect together.
So battery 1 is the “main” battery that is hooked up to the inverter. Batteries 2 and 3 each connect to battery 1. Here are some close ups of the sides of the batteries.
When this was first wired up, I had no solar panels and the inverter essentially just acted in pass-through mode. The only time the batteries would kick on is in the event of a power outage (though this has yet to happen — PG&E is generally pretty stable in this area, especially in the winter. Summer is another story though).
I could have used the batteries to “peak shave,” where I charge them during low rates and discharge them to load during high rates. I didn’t really care to do this that much though because my end goal was to have my panels charge them completely anyway. Also, I couldn’t figure out how to do this in the EG4 software. User error, no doubt. I’m sure I could have done it if I called support though, but I didn’t care enough to follow up.
Lastly, this is also when I installed the new subpanel. I also took this opportunity to run a new dedicated 20A circuit to my server rack, since the rack was right next to the new subpanel.
Voltage Issues
I did have to call support for a voltage issue I started seeing as my batteries sat around for a few weeks while I worked on getting my panels installed. The battery state of charge (SOC) stated that it was at 90%, but I was getting a low voltage warning on my batteries.
After calling Signature Solar, they mentioned this can happen if your batteries sit around for a while without charging or discharging. They had me re-calibrate the SOC with the voltage by having the inverter treat the batteries as lead acid for a few charge cycles. By this time I did have one string up and running, but not enough to completely run my loads and
I had to manually change the charge and discharge settings every couple days to get the batteries to fully charge and discharge (100% and 20% respectively). After cycling my batteries 5 times over a couple weeks my batteries have been running smooth.
Only Make That Mistake Once
Now’s a good time to go over the mounting solution I used: Ironridge. My solar planner put in my system and roof specs into some software, which kicked out a bill of materials (BOM) I could give to my local Platt. That BOM ended up being a little bit off but was close. I had to order a couple more bolts and also returned a few rails that I didn’t end up using. The Ironridge system wasn’t cheap (I think around 2.5k for all the pieces), but it is extremely high quality, and this is something I want to last for years.
Using a chalk line, I marked the rafters I would be using as the mounting points for the rails. Ironridge does sell a model that allows you to not have to use rafters, but I opted for the rafter model that uses less screws.
Once the rails were installed (making sure to seal everything with outdoor rated silicone), I made my first mistake (related to the panels) that would have to be corrected later: I didn’t plan out all my wiring and run it before actually mounting the panels. Things like the wiring to the Tigo TAPs and ground wires. Why does this matter? Well, it is code that no wires touch the roof, and it is a huge pain to fix it afterwards. I ended up having to take some panels back off to fix it, but not all of them.
On later panels I ran the ground wire and communication cable for the TAP, as well as prepped each panel with cable clips as they were installed. It is much easier to cable manage as you go instead of having to fix it later. Luckily, I only made this mistake on the first string.
Wiring the First String and Optimizers to the Inverter
Each panel in the string is wired to a Tigo TS4-A-O optimizer, with each optimizer wired to the next one in the string. My first string (south facing) has 12 panels. I then ran a positive from one end of the string and the negative from the other end into a junction box (pictured above). Inside the junction box they are connected to metal clad (MC) cable, which runs through the attic to one of the inverter’s MPPT hookups.
The reason for using MC cable + junction boxes are so I didn’t have to work with metal conduit. I also think it ends up looking a lot nicer because you don’t have long metal conduits running all over your roof. The downside is you have to crawl around in the attic to route your wiring. The end result looks pretty great though.
Aside the positive, negative, and ground wires, you’ll notice there is also a white cable coming out of the junction box. That is for the TAP. The TAP provides the avenue for wireless communication between the CCA and the optimizers. This is critical because when the ESTOP is pressed, your panels need to turn off for fire safety. It is also wired into the inverter/batteries. This means at the press of a button all solar, inverter, battery, and electrical loads are shutoff.
Each TAP is daisy chained from the previous TAP. Tigo has excellent documentation on how to wire up the TAPs and CCA.
Tigo Software Setup
The Tigo software is pretty straightforward. You add information about your panels, inverter specs, and the serial numbers for your CCA and all the optimizers. Then the system scans for the optimizers, which you can associate on your system view so that the layout matches the panels on the roof, like this:
I did run into a weird issue where Tigo’s system was reporting missing or incorrect types of optimizers. I called Tigo about this and they recommended waiting a couple hours. Sure enough, a few hours later everything reflected correctly in the web and mobile apps.
The last thing to do before I could start using my system was to make sure my ESTOP was hooked up to the CCA and my inverter. I followed some tutorials on YouTube to do this.
Now I was ready to start charging my batteries and running my load from solar.
EG4 Software
Similar to Tigo, the EG4 software is pretty straightforward and defaulted to a lot of reasonable settings. These are a few settings I had to change:
- Battery type to Lithium
- PV input mode to however many MPPT hookups I was using
- Off-grid mode to enable (temporary until I had PTO)
Based on manufacturer support, I setup my batteries to charge to 100% and discharge to 20%.
I did have to do a firmware update for the inverter. You can use the mobile app to do this, but I highly recommend just upgrading firmware through the web UI — it’s much more reliable. I kept having issues with the mobile app firmware update failing. My understanding is that is more useful for locations where you have no internet access. Updating the firmware will cycle the inverter and cut power to your loads for a few seconds.
I also had to update the firmware for the screen on the inverter, which required using a USB drive. Again, I ran into a few issues here but eventually got it working by using an old USB 2 drive with FAT32. This had to be done because after the inverter firmware update, the screen was displaying incorrect wattages. The screen firmware update fixed that. I’m not quite sure why the screen requires a local firmware upgrade, versus the inverter itself that can be done over the internet. Here’s what the screen looks like:
You’ll notice in the above screenshot the inverter is in “Backup Power” mode because I have offline mode enabled, so as to not bleed power back to grid. It would also look like that in the event of a power outage. Once I got my PTO I was able to turn that setting off and it now looks like this:
Power can now flow between solar, my batteries, my loads, and the grid as needed. In my case my power flow is such:
- Solar powers loads
- Excess solar goes to batteries
- Once batteries get to 100%, excess power is exported
- If solar is not enough to power loads, add supplemental power from batteries
- If solar and batteries are not enough to power loads (rare), import supplemental power from grid
- Batteries will then discharge to 20%
- Import power from grid if batteries become depleted
I’m Getting Pretty Good at This
You may also be wondering how I got all the panels on the roof. Well maybe not, but I’m going to tell you anyway. My dad had a sweet portable set of stairs. This made getting the panels up on the roof much easier, as using a regular ladder would have been a nightmare. I’ve seen some folks use a winch, but we didn’t end up needing one.
The first of the other strings is an east facing string that consists of 12 panels, split across two sections of the roof. That means I had to use junction boxes to connect them, so as to not have any cables running across the top of the roof (in metal conduit). Aside from that, and also running the wires correctly during installation this time, the east facing string installation went well.
The west facing string is a little different because it’s actually two strings run in parallel: 14 panels divided into 2 strings of 7. Similar to the east facing string, I had to jump one of the panels through the attic to another section of 6 panels to make it 7. Then each string of 7 connect to the inverter using separate MPPTs. These MPPTs are actually the same internal circuit, but allow up to 25 amps (the other MPPTs are only 15 amps). You can see the visualization of this in the Tigo image above: strings A, B, C, and D. C and D are run in parallel and show up as one string in the EG4 software (PV1).
Inspection Time
Once everything was up and running, it was time for prepping for the inspection. This means tidying everything up, installing warning labels, etc.
When the inspector came out he found the following issues that needed to be fixed:
- Missing site diagram placard at MSP
- New grounding rod required at MSP
- Interconnect heat detector with smoke detectors in bedrooms / hallway
- Add labels every 10 ft for DC cables in attic
- Add a spring to a door into the attic from the garage (fire safety)
- Fire caulking where DC cables exit the attic into the garage
- Some cable management on south facing string (the first one we didn’t cable manage correctly the first time)
A week later and those issues fixed, the inspection passed! What a relief.
Permission to Operate (PTO)
We finally arrived. The final hurdle: PTO. I will mention at this time the system is fully operational and powering the house, I’m just unable to dump excess power to grid to get paid (at least a little…). At this point I was generating maybe between 40–50 kwh, depending if the AC kicked on at all on a warm spring day. But I could see my batteries were charged often by 12–1 PM, and my solar panel output would drop from 10–12 kw to only ~1.5kw to run my loads.
After I figured out where to start the PTO application process (it’s not the regular PG&E site, it’s actually https://yourprojects-pge.com), I started the application. Here’s where I ran into another roadblock: the application started asking me questions I had no clue how to answer. So back to my solar planner I went, who was able to recommend me someone who specializes in solar applications to power providers. I had the option of paying her $300 to do the entire thing, or $150 for only portions I couldn’t figure out. I opted for the $300 fee and she was able to get my application submitted in a couple days.
A week later it was approved. The only thing left was to disable off grid mode. The system then started exporting power once the batteries were full.
On a nice sunny day I now yield around 85 kwh. That number of course depends on temperature, cloud cover, and the time of year. But for now, my electrical bill is completely covered and then some. Here is the first couple weeks of electrical usage for May, with export enabled:
That tiny bit of power import on the 9th was because I accidently turned on quick charge for around 10 minutes, which started charging the batteries from grid. Woops.
I have noticed that PG&E is reporting a little bit of power draw, even when I am running from solar/batteries. The inverter is reporting similar (albeit a little bit lower than what PG&E says). We’re talking maybe ~1 kwh, which is fine considering I’m often exporting 30–40 kwh of power to the grid.
Lessons Learned
Well, if you made it this far I congratulate you on successfully navigating your way through my often tangential ramblings. And if you jumped straight here from my intro, here’s a list of things I learned along the way that can hopefully help others in their quest to give the middle finger to PG&E. In no particular order:
- Batteries are a must if you are on NEM3.
- Use a traditional string inverter for lower power loss.
- Purchase from a reputable reseller that offers good support, you’ll need it.
- Verify equipment before you install it.
- Read the manuals — cover to cover.
- Hire a solar planner to assist in navigating local compliance and creating required plans.
- Plan and run your wires as you install the panels. This really sucks to fix after the fact.
- Size your system correctly and plan for future needs.
- Hire someone to do the PTO application if you are at all confused navigating the application process.
You may read those bullet points and think to yourself, well duh. Why wouldn’t you read the manual? Or you may disagree on certain points. I never said I was an expert. I do hope my experience can help others see it isn’t an impossible task to deploy your own solar and battery system. On the other hand, it’s not something you can just do in a weekend. It’s somewhere in the middle I suppose.
How long did this all take?
I started seriously considering doing a solar system about a year ago. Did it need to take a year? No. There were weeks where nothing was done on the system because my dad was busy and I had work. This was the first time I had attempted such a project and there was a lot to learn. Ok, enough excuses, here is the rough timeline:
What’s next?
Sleep, I guess. I did just got my first bill that included some days where I was exporting power to PG&E. Let me tell you, it’s pretty sad to see the rates that PG&E is giving to purchase your power. It really is around 25% of what they charge you (and that’s 25% of tier 1 pricing — if you get into tier 2 pricing it’s even less!), which is in line with the estimated 75% rate cuts I referenced earlier. So that sucks.
That is also power I wasn’t using though, so I guess I won’t say no. Honestly, I planned this system to cover nearly all my electrical needs, so anything I am getting from PG&E is gravy. In this case it’s the smallest gravy boat you can imagine.
I’m not fully independent from PG&E just yet either; I am using natural gas to power my furnace and water heater. Maybe one day I’ll look at a heat pump water heater (that has an added bonus of cooling the garage even more — where I have my server rack), but the days of 1k$+ electrical bills are a thing of the past. I did pick up a new addiction though: my reddit usage has quickly been overtaken by the EG4 monitoring app.
This project was a long road but completely worth it. If anyone has any questions please ask!
I now leave you with another haiku.
Rates rise like the sun
Set the temp to 68
No longer hostage
-Joe
What's Your Reaction?
 Like
0
Like
0
 Dislike
0
Dislike
0
 Love
0
Love
0
 Funny
0
Funny
0
 Angry
0
Angry
0
 Sad
0
Sad
0
 Wow
0
Wow
0